Difference between revisions of "Simple Theme - your store's header"
From Spiffy Stores Knowledge Base
| Line 1: | Line 1: | ||
The header of your store contains the following... | The header of your store contains the following... | ||
| − | * A currency converter | + | * [A currency converter #Enabling_the_currency_converter] |
* An announcement bar | * An announcement bar | ||
* Icons for search, customer pages, a customer wishlist, and the cart. | * Icons for search, customer pages, a customer wishlist, and the cart. | ||
Revision as of 08:37, 16 June 2020
The header of your store contains the following...
- [A currency converter #Enabling_the_currency_converter]
- An announcement bar
- Icons for search, customer pages, a customer wishlist, and the cart.
- Your logo or store name
- Your top menu
- A favicon that appears in the tab of the browser
Each of the options can be configured in the "Header" section of your Theme editor. To get to your Theme editor, go to the "Design & Assets -> Theme editor" section of your store's Toolbox.
Contents
Enabling the currency converter
xxx
Setting up the Announcement Bar
xxx
Enabling the Customer Wishlist
xxx
Uploading your logo
You should upload a transparent PNG of your logo to get it looking great... otherwise it will be in a big white box! The theme editor will resize the logo for you when you upload it, but you will get a much better result if you resize your logo before uploading it.
- Tick the "use a custom logo?" option
- Upload your logo image
- Click the "Save Settings" button
- Check your logo size is OK by previewing your store
If you need to adjust the size, increase or decrease the "Max Logo Width" setting. Whenever you change this setting, you will need to re-upload your logo.
Using Pixlr to create create a logo image
Pixlr is a free online image editing program, where you can edit your images in your web browser.
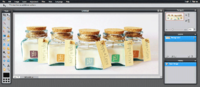
Pixlr editor

- Go to the Pixlr editor
- Click "Create a new image"
- Set the width to 960 and the height to 200, tick the "Transparent" box, and click OK. 960px is the full width of your store. 200px is the recommended maximum logo height.
- You now have your canvas to work within. You will need to explore the various tools and options.
- Open your own logo image in Pixlr using "File -> Open image" in the Pixlr menu. Select the "Wand" tool, and select only the type and any icons in your logo. There are also various other tools available so that you can select your logo without the background.
- Once you have your logo selected, you can then copy and paste it into your canvas.
- When you have pasted your logo image into the canvas, you can resize it by using the <CTRL> and <T> keys on your keyboard. Make sure you're viewing it at 100%, and see if you can get it centered with a bit of space around it. You can then crop closer to the edges of your logo image using the crop tool.
- When your logo is looking gorgeous, save it by choosing "File -> Save" from the Pixlr top menu.
- Choose "PNG (Transparent full quality) for your format, and save it to your computer
- When you've saved the file to your computer, upload it in your Theme Editor.