Difference between revisions of "Creating a data feed for Google Merchant Center"
From Spiffy Stores Knowledge Base
(Created page with "Setting up a product data feed for your products is a great way to get added exposure for your online store by syndicating them to a variety of these shopping portals. Produc...") |
|||
| (28 intermediate revisions by 2 users not shown) | |||
| Line 1: | Line 1: | ||
Setting up a product data feed for your products is a great way to get added exposure for your online store by syndicating them to a variety of these shopping portals. | Setting up a product data feed for your products is a great way to get added exposure for your online store by syndicating them to a variety of these shopping portals. | ||
| − | + | Our Google Merchant Center feed is the same format as the feed you would also need for Pinterest, so you can use the feed for both or either of these services. | |
| − | <font color="red">IMPORTANT!<br>You need to ensure that all | + | Product data feeds are updated whenever you make a change to your products, so you can be sure that they're up to date. To create a data feed for [http://www.google.com/merchants Google Merchant Center] and/or [https://help.pinterest.com/en/business/article/before-you-get-started-with-catalogs Pinterest] follow the instructions below. |
| + | |||
| + | <font color="red">IMPORTANT!<br>You need to ensure that all products in your feed have a Barcode (UPC/EAN, ISBN) and SKU (Stock Keeping Unit) before submitting your data file Google Merchant Center. If you don't do this, they will not appear in your feed, and they will not accept your submission!</font> | ||
=== Step 1 - Create a collection of products === | === Step 1 - Create a collection of products === | ||
| − | + | ||
| − | <gallery heights="126px" widths="200px" class="right">Image:Shopping-com-data-feed-01.png|Collections Section</gallery> | + | <gallery heights="126px" widths="200px" class="right"> |
| − | Firstly we need to have a list of products to send to | + | Image:Shopping-com-data-feed-01.png|Collections Section |
| + | </gallery> | ||
| + | |||
| + | Firstly we need to have a list of products to send to [http://www.google.com/merchants Google Merchant Center] or [https://pinterest.com Pinterest]. To create this, you'll need to create a collection that contains all of the products you want in your data feed. You can create a [[Standard Collections|Standard Collection]] or a [[Super Collections|Super Collection]]. This can be done in the "Collections" section of your store's Toolbox. | ||
| + | |||
| + | If you already have created a collection for another provider (for example Shopping.com), or you just want to have all of your products in your feed, you can skip this step. | ||
=== Step 2 - Creating your data feed === | === Step 2 - Creating your data feed === | ||
| − | + | ||
| − | <gallery heights=" | + | <gallery heights="200px" widths="200px" class="right"> |
| − | After you have created your collection, go to the <br>"Marketing -> Product data feeds" section of your store's Toolbox, and click the "Activate" button in the | + | Image:Google-data-feed-01.png|Creating your data feed |
| − | # Enter a name for your feed. It's not used anywhere except for your reference | + | </gallery> |
| − | # Select the collection you created in Step 1 | + | |
| + | After you have created your collection, go to the <br>"Marketing -> Product data feeds" section of your store's Toolbox, and click the "Activate" button in the Google Merchant Center section. If you can only see a feed for Facebook, it means that you're on a plan that doesn't include feeds for other services. You should consider upgrading your plan if you want to take advantage of more advanced features like data feeds. | ||
| + | |||
| + | # Enter a name for your feed. It's not used anywhere except for your reference | ||
| + | # Select the collection you created in Step 1 | ||
# Click the "Activate" button | # Click the "Activate" button | ||
| − | < | + | === Step 3 (Google Merchant Center) - Adding your data feed on the Google Merchant Center website === |
| + | |||
| + | <gallery heights="200px" widths="200px" class="right"> | ||
| + | Image:Google-data-feed-02.png|Adding your data feed on the Google Merchant Center website | ||
| + | </gallery> | ||
| + | |||
| + | Once you have signed up for a Google Merchant Center account, you can then add your data feed. In the "Data feeds" section of the Merchant Centre, click the "New Data Feed" button. | ||
| + | |||
| + | <div style="clear: both"></div> | ||
| + | <gallery heights="176px" widths="200px" class="right"> | ||
| + | Image:Google-data-feed-03.png|Data feed options | ||
| + | </gallery> | ||
| + | |||
| + | On the next screen, choose the country you are based in, enter "data-feed.xml" for your filename, and click "Save changes". | ||
| + | |||
| + | <div style="clear: both"></div> | ||
| + | <gallery heights="200px" widths="200px" class="right"> | ||
| + | Image:Google-data-feed-04.png|Click "Create schedule" | ||
| + | </gallery> | ||
| + | |||
| + | Click the "Create schedule" link next to your data-feed.xml file. | ||
| + | |||
| + | <div style="clear: both"></div> | ||
| + | <gallery heights="200px" widths="200px" class="right"> | ||
| + | Image:Google-data-feed-05.png|Scheduled upload | ||
| + | </gallery> | ||
| + | |||
| + | In the Popup window, choose "Weekly", select your timezone, and then paste in the URL of your data feed that you have copied from the "Marketing -> Product data feeds" section of your store's Toolbox. In most browsers, you can right-click on the URL and copy it. | ||
| + | |||
| + | Username and password should be left blank. | ||
| + | |||
| + | When you have done this, click the "Schedule and fetch now" button. Google will fetch your XML file. If there are any issues, it's likely because there are issues with product data. You will need to check any products in your store's Toolbox that you receive warnings about to make sure that they all have a Barcode (UPC/EAN, ISBN) and SKU (Stock Keeping Unit). | ||
| + | |||
| − | === Step 3 - Adding your data feed | + | === Step 3 (Pinterest) - Adding your data feed to Pinterest === |
| − | |||
| − | |||
| − | + | Pinterest have an excellent tutorial on adding your feed here -> https://help.pinterest.com/en/business/article/data-source-ingestion | |
| − | < | + | <br><br> |
| + | == Common Errors == | ||
| − | < | + | <font color="#FF6B00">Insufficient product identifiers: Missing two out of three attributes [GTIN, brand, mpn]</font> |
| − | + | The brand field is already populated, so this means that you have not entered a Barcode for this product. You will need to edit the product in your store's Toolbox and ensure it has a Barcode number entered in the "Barcode" field. You can also use the [[Bulk Product Export and Import|Import/Export]] feature to update your products if your store is on the Business Plan or above. You can enter a GTIN, UPC, EAN or ISBN here. More information about a GTIN can be found at http://en.wikipedia.org/wiki/Global_Trade_Item_Number | |
| − | < | + | <font color="#FF6B00">Missing required attribute: id</font> |
| − | + | This means that you have not entered a SKU for this product. You will need to edit the product in your store's Toolbox and ensure it has a SKU entered in the SKU field. You can also use the [[Bulk Product Export and Import|Import/Export]] feature to update your products if your store is on the Business Plan or above. | |
| − | < | + | <font color="#FF6B00">Missing recommended attribute: google product category</font> |
| − | + | We cannot include the Google product category in the feed. You can safely ignore this warning. | |
| − | < | + | <font color="#FF6B00">Website URL not claimed</font> |
| − | + | You will need to claim your website in the General Settings section of Google Merchant Center. | |
| − | |||
Latest revision as of 13:10, 1 February 2022
Setting up a product data feed for your products is a great way to get added exposure for your online store by syndicating them to a variety of these shopping portals.
Our Google Merchant Center feed is the same format as the feed you would also need for Pinterest, so you can use the feed for both or either of these services.
Product data feeds are updated whenever you make a change to your products, so you can be sure that they're up to date. To create a data feed for Google Merchant Center and/or Pinterest follow the instructions below.
IMPORTANT!
You need to ensure that all products in your feed have a Barcode (UPC/EAN, ISBN) and SKU (Stock Keeping Unit) before submitting your data file Google Merchant Center. If you don't do this, they will not appear in your feed, and they will not accept your submission!
Contents
Step 1 - Create a collection of products
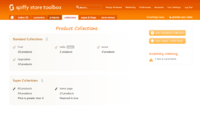
Firstly we need to have a list of products to send to Google Merchant Center or Pinterest. To create this, you'll need to create a collection that contains all of the products you want in your data feed. You can create a Standard Collection or a Super Collection. This can be done in the "Collections" section of your store's Toolbox.
If you already have created a collection for another provider (for example Shopping.com), or you just want to have all of your products in your feed, you can skip this step.
Step 2 - Creating your data feed
After you have created your collection, go to the
"Marketing -> Product data feeds" section of your store's Toolbox, and click the "Activate" button in the Google Merchant Center section. If you can only see a feed for Facebook, it means that you're on a plan that doesn't include feeds for other services. You should consider upgrading your plan if you want to take advantage of more advanced features like data feeds.
- Enter a name for your feed. It's not used anywhere except for your reference
- Select the collection you created in Step 1
- Click the "Activate" button
Step 3 (Google Merchant Center) - Adding your data feed on the Google Merchant Center website
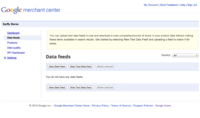
Once you have signed up for a Google Merchant Center account, you can then add your data feed. In the "Data feeds" section of the Merchant Centre, click the "New Data Feed" button.
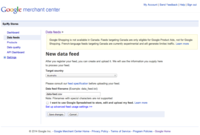
On the next screen, choose the country you are based in, enter "data-feed.xml" for your filename, and click "Save changes".
Click the "Create schedule" link next to your data-feed.xml file.
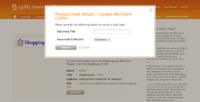
In the Popup window, choose "Weekly", select your timezone, and then paste in the URL of your data feed that you have copied from the "Marketing -> Product data feeds" section of your store's Toolbox. In most browsers, you can right-click on the URL and copy it.
Username and password should be left blank.
When you have done this, click the "Schedule and fetch now" button. Google will fetch your XML file. If there are any issues, it's likely because there are issues with product data. You will need to check any products in your store's Toolbox that you receive warnings about to make sure that they all have a Barcode (UPC/EAN, ISBN) and SKU (Stock Keeping Unit).
Step 3 (Pinterest) - Adding your data feed to Pinterest
Pinterest have an excellent tutorial on adding your feed here -> https://help.pinterest.com/en/business/article/data-source-ingestion
Common Errors
Insufficient product identifiers: Missing two out of three attributes [GTIN, brand, mpn]
The brand field is already populated, so this means that you have not entered a Barcode for this product. You will need to edit the product in your store's Toolbox and ensure it has a Barcode number entered in the "Barcode" field. You can also use the Import/Export feature to update your products if your store is on the Business Plan or above. You can enter a GTIN, UPC, EAN or ISBN here. More information about a GTIN can be found at http://en.wikipedia.org/wiki/Global_Trade_Item_Number
Missing required attribute: id
This means that you have not entered a SKU for this product. You will need to edit the product in your store's Toolbox and ensure it has a SKU entered in the SKU field. You can also use the Import/Export feature to update your products if your store is on the Business Plan or above.
Missing recommended attribute: google product category
We cannot include the Google product category in the feed. You can safely ignore this warning.
Website URL not claimed
You will need to claim your website in the General Settings section of Google Merchant Center.


