Email Marketing
From Spiffy Stores Knowledge Base
Some of our themes include the ability to add a subscribe form to your theme, so your customers can subscribe to your newsletters. To add this, you should refer to the instructions for the theme that you are using.
You can also connect your store's checkout so that during the checkout process, you can offer your customers an option to sign up for further promotional emails from you.
This is done by setting up what’s called a “web hook” in your Toolbox. When you have added in the web hook, the purchaser’s details can be captured at the checkout and automatically subscribed to a list in your MailChimp or Campaign Monitor email service.
How to send a new customer’s email details directly to your MailChimp or Campaign Monitor email list
To create this web hook, you must first get the LIST ID and API key from your account:
If you use MailChimp
- Log into your MailChimp account.
- To find the Audience ID: Click on the "Audience" link in the top menu, then click "manage Audience -> Settings" on the right. On the next page, click on "Audience name and campaign defaults". On the next page, you should find the Audience ID. Copy it.
- To find the API key: Navigate to "Account > Extras > API Key". The API key is under the “Your API keys” section. If there aren't any keys there, click "Create Key" to create a new one. Copy it.
If you use Campaign Monitor
- Log into your Campaign Monitor account.
- To find the LIST ID: Click on the "Lists & Subscribers" tab, then click on the name of the list you want purchasers subscribed to. Click the "change name/type" link. The LIST ID you need is displayed under the heading "API Subscriber List ID". Copy it.
- To find the API key: Click on "Account Settings" at the top of the screen. On the next page, click on the link that says "Show API Key". Copy it.
Now you have copied this data, you can create your web hooks.
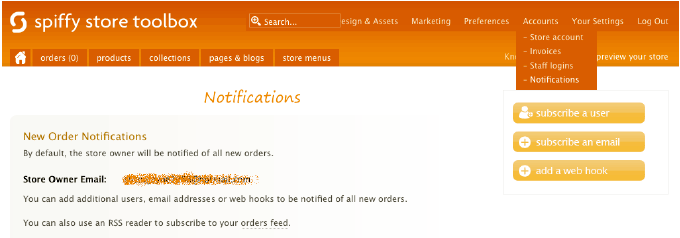
Go to the "Accounts > Notifications" page of your Spiffy Store Toolbox.
Click on the orange button “Add a web hook”.
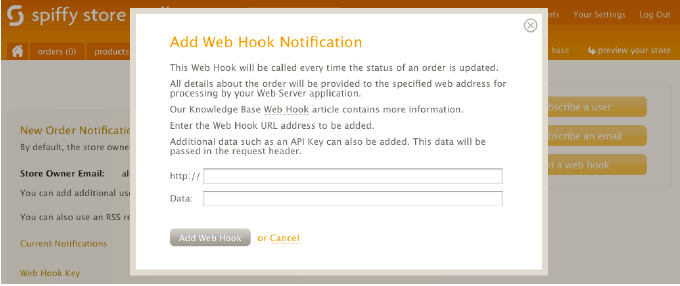
Complete the pop up form with the data from your MailChimp or Campaign Monitor account as follows:
MailChimp
- Paste spiffyserver.com/apps/mailchimp/AUDIENCE_ID into the “http://” field, replacing AUDIENCE_ID with the actual Audience ID you copied (if you don’t provide this AUDIENCE_ID, the application will use the first list in your MailChimp account).
- In the “Data” field, paste in the API Key.
- The completed form fields should look something like this:
http:// spiffyserver.com/apps/mailchimp/6574htxxxxxxxxxx
Data: xca891c36xxxxxxxxxxx
- Click “Add Web Hook” to save the information.
Campaign Monitor
- Paste spiffyserver.com/apps/campaign_monitor/LIST_ID into the “http://” field, replacing LIST_ID with the actual list ID (if you don’t provide this LIST_ID, the application will use the first list in your Campaign Monitor account).
- In the “Data” field, paste in the API Key.
- The completed form fields should look something like this:
http:// spiffyserver.com/apps/campaign_monitor/a4f35r6xxxxxxxxxx

Data: 34f57g869kxxxxxxxxxxx
- Click “Add Web Hook” to save the information.
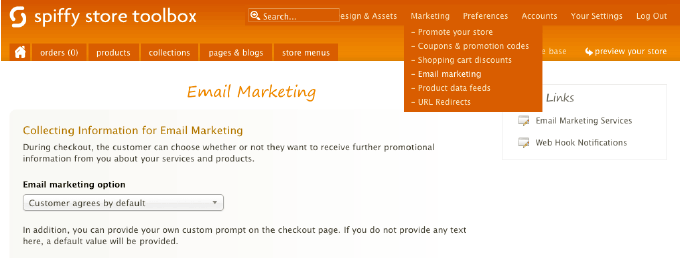
In Marketing > Email Marketing, choose whether the customer is opted in or out by default. You can also change the text of the prompt that appears on the checkout page.


