Accepting Bitcoin Payments
From Spiffy Stores Knowledge Base
Bitcoin is a form of digital currency, created and held electronically. No one controls it. Bitcoins aren’t printed, like dollars or euros – they’re produced by people, and increasingly businesses, running computers all around the world, using software that solves mathematical problems.
It’s the first example of a growing category of money known as cryptocurrency, and we're delighted that all Spiffy Stores merchants can now accept payments using Bitcoin in their ecommerce store.
To accept Bitcoin payments in your online store, you must have a Spiffy Store, where you can enable one or more of the following Alternative Payment Methods from the Preferences > Checkout and payment section of your store's admin...
Contents
Accept Bitcoins with the Coinbase payment gateway
Activating Coinbase allows your customers to pay you with Bitcoins. Some features of the Coinbase gateway are...
- There is no additional fee to accept Bitcoins.
- Your Coinbase wallet can be linked to a US bank account to easily convert Bitcoins into cash. Transaction fees might apply at this stage. Learn more ›
- If you do not have a US bank account, you can still accept Bitcoins with Coinbase, but you'll need to transfer them to an external wallet to convert them to another currency or cash them out.
- Transactions are secure and meet the highest standards for ecommerce security.
Follow this link for more information about Coinbase.
Setting up your Coinbase account
Before you activate the Coinbase payment gateway, you need to sign up for a Coinbase account and create a merchant profile.
To sign up for a Coinbase account:
- Visit the Coinbase website.
- Enter your name, your email address, and a password.
- Click the I agree to the User Agreement and Privacy Policy checkbox.
- Click CREATE ACCOUNT.
- You'll be sent an email containing a link to verify your email address. Click the link in the email, after which you'll be directed to your new Coinbase account.
- Click the Let's get started link and follow the remaining steps to complete the account setup process:

To complete the Coinbase merchant profile setup:
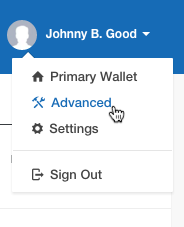
- Click your name in the top right corner of your Coinbase account.
- From the drop-down menu, click Advanced:
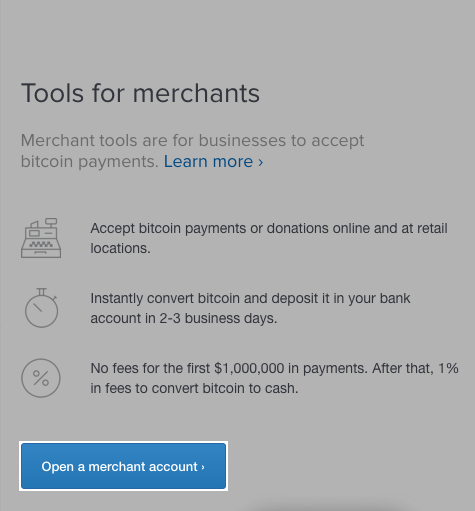
- Click Merchants in the top menu:

- Click Open a merchant account:
- Fill out the fields on the Merchant Profile page.
- Click Save Changes.


Connect your Coinbase account to Spiffy Stores
While logged in to Coinbase, you'll need to create an API Key and API Secret. To do this:
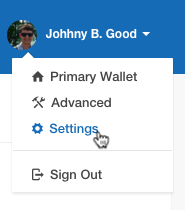
- Click your name in the top right corner of your account.
- From the drop-down menu, click Settings:
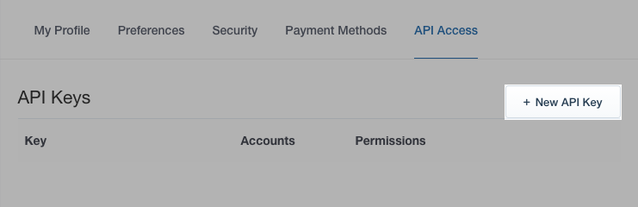
- Click API Access:

- Click + New API Key:
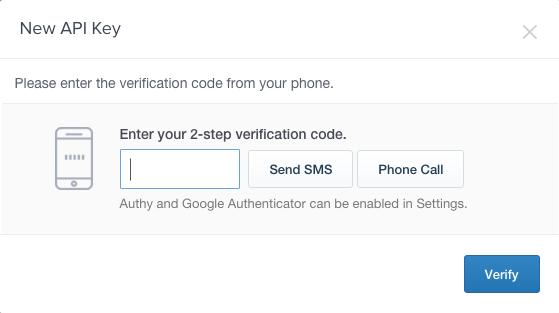
- Click to choose whether to receive a verification code via SMS text message or a phone call. After you've received the verification code, enter it in the text field:
- Find API v1 permissions (legacy) and click show next to it.
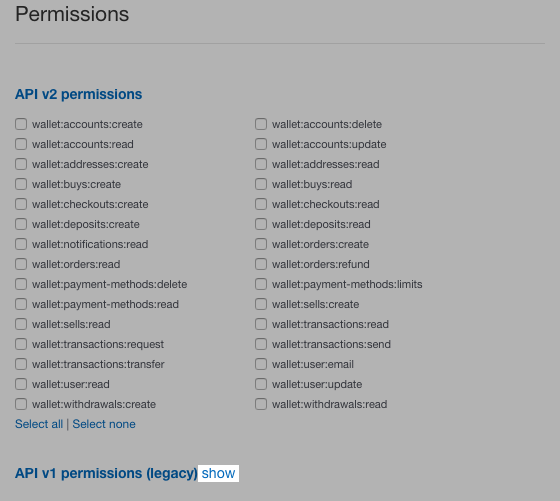
- Click the merchant checkbox.
This gives Spiffy Stores API permissions to create payment buttons and forms, view your basic user information, edit your merchant settings, and generate new receiving addresses. You can choose to give Spiffy Stores other API permissions, but they are not required. - Leave everything else as it appears, and click Create to generate your API Key and Secret.
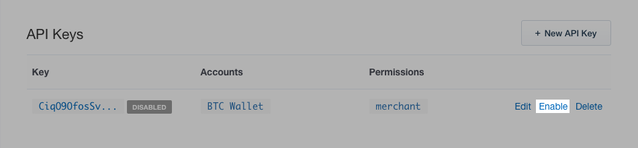
- By default, the Key and Secret have a disabled status and need to be activated. Click Enable to activate them:
- A verification code will be emailed to you. Copy and paste this code into Coinbase:
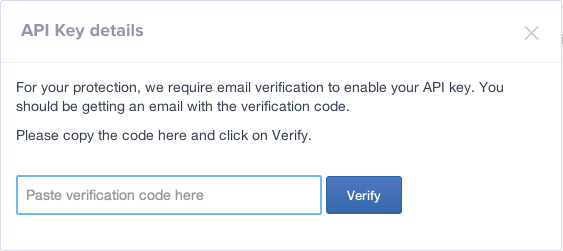
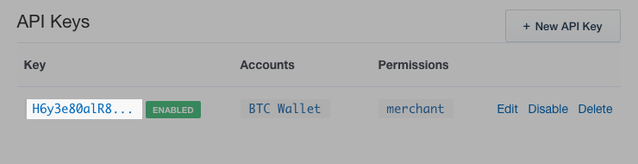
- Click Verify. The API Key and Secret will now be enabled.
- In a new browser tab, open your Spiffy Stores admin.
- From your Spiffy Stores admin, go to the Preferences > Checkout & Payment section.
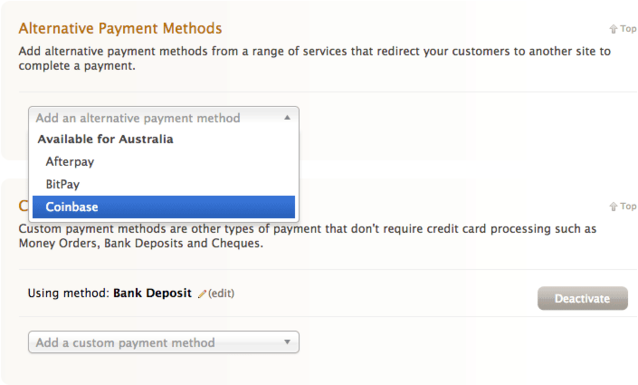
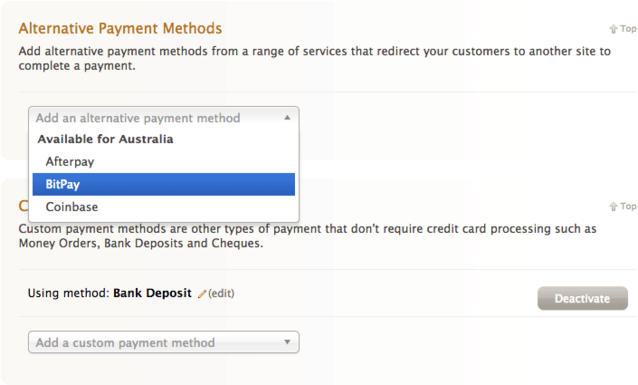
- Scroll down to the Alternative payments section.
- Click Select an additional payment method.
- Click Coinbase:
- Return to the browser tab of your Coinbase account API settings. If you closed the tab, click here to sign in again.
- Click your Key to show the API Key and API Secret.
- Enter your verification code.
- Click Verify.
- Copy the API Key from your Coinbase account and paste it in the corresponding field in your Spiffy Stores admin.
- Copy the API Secret from your Coinbase account and paste it in the corresponding field in your Spiffy Stores admin:
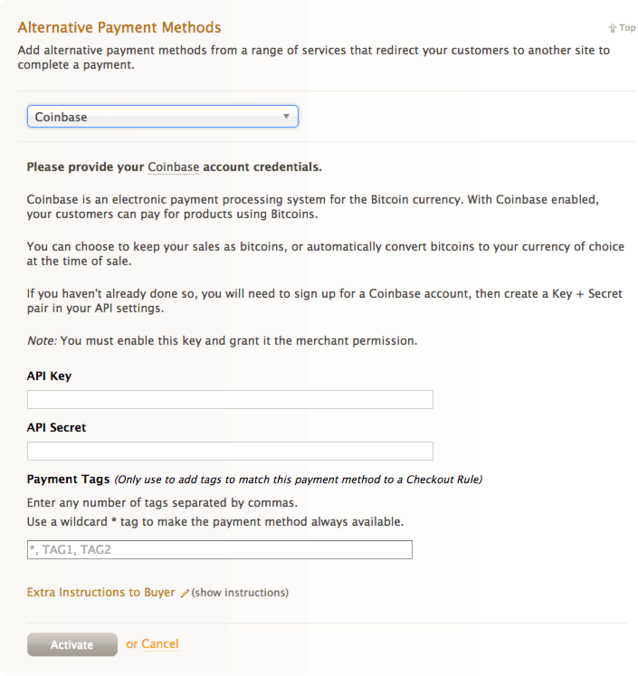
- Click Activate.


Your checkout page will now include an option for visitors to pay with Bitcoins via Coinbase, alongside your other checkout options:
Accept Bitcoins with the BitPay payment gateway
The Spiffy Stores BitPay payment gateway allows you to offer your customers the option of paying with Bitcoins. The main features of the BitPay gateway are:
- Customers check out with an internet cash currency
- Transactions can't be reversed automatically (unlike credit cards or PayPal)
- Transactions are secure and meet the highest standards for e-commerce security
- BitPay charges a 1% transaction fee, or 0% if you pay a monthly subscription.
When you set up a BitPay account, you can choose to receive your payments in:
- Bitcoins, paid into your online Bitcoin wallet
- Your local currency, paid into your bank account once every business day.
Activating BitPay
Before you activate the BitPay payment gateway, you need to apply for a BitPay account at the BitPay website. Your application will likely take a few days to be approved. You will begin receiving regular payouts from BitPay when your account has been authorized.
To activate the BitPay payment gateway:
- From your Spiffy Stores admin, go to the Settings > Checkout & Payment section.
- Scroll down to the Alternative Payments section of the screen. If you don’t see the Alternative Payments section, reload the page in your browser.
- Click Select an Additional Payment Method, then click BitPay.
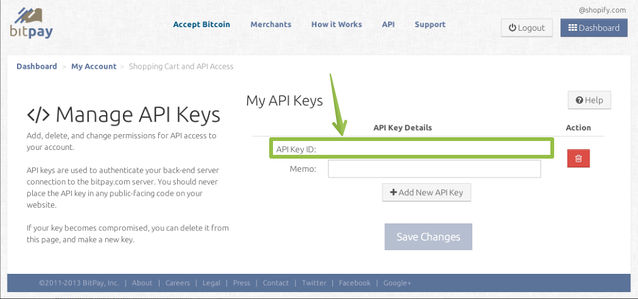
- Type your BitPay API Key ID, then click Activate.
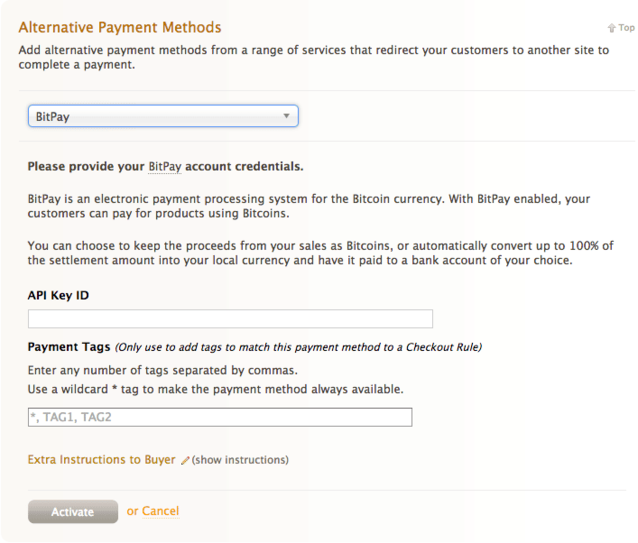
Having trouble locating your BitPay Access Key? BitPay refers to it as your API Key ID and when logged in to BitPay, you'll find it at https://bitpay.com/api-keys: