These instructions are for setting up email using IOS 6. If you are using IO7, please click here -> How to configure an Apple iPhone using IOS 7
|
|
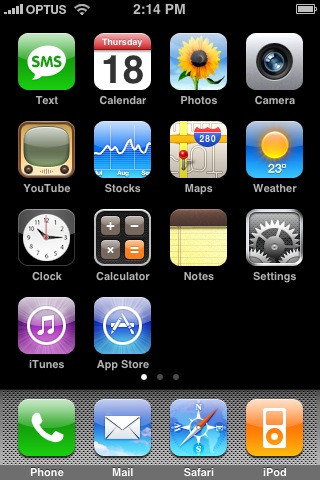
From the Home menu on your iPhone tap on the Settings icon.
|
|
|
|
|
|
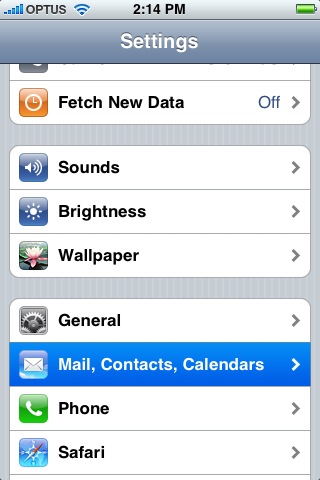
Slide down your settings page to the bottom and tap on the Mail, Contacts, Calendar section.
|
|
|
|
|
|
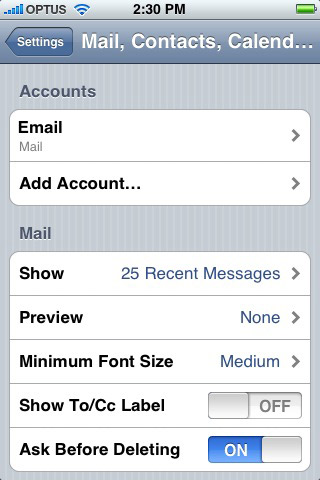
This screen shows the accounts page with an account already added, however if you haven't set up an email previously it may look a bit different.
Tap on add account to start the account creation process.
|
|
|
|
|
|
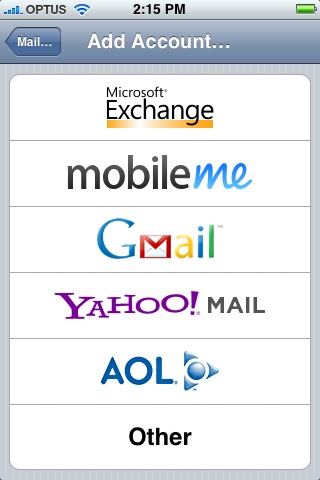
Tap Other.
|
|
|
|
|
|
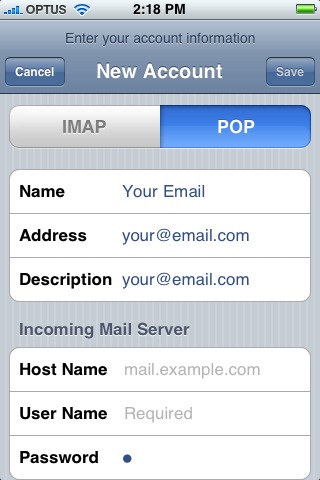
Spiffy Stores uses POP (POP3) mail for our email servers, so tap that and make sure it's highlighted in blue as shown on the left.
The following information must be filled out;
Name: The name you wish your emails to come from.
Address: Your full email address. If you're using your own domain name in your store, you can set this to be the "Alias" email address that you've created.
Description: Your full email address.
When you have entered these details, tap "SAVE" and your iPhone will attempt to automatically connect. It will then show an area where you enter your incoming and outgoing server details.
|

|
|
Incoming Mail Server Settings for Spiffy Stores are;
Host Name: Your mail server domain that is displayed on the "Preferences -> Email Accounts" section of your store's Toolbox. (e.g. mail.yourstore.spiffystores.com)
Username: The full email address you are setting up(e.g. you@yourstore.spiffystores.com)
Password: The password that you set when you created your mailbox.
|
|
|
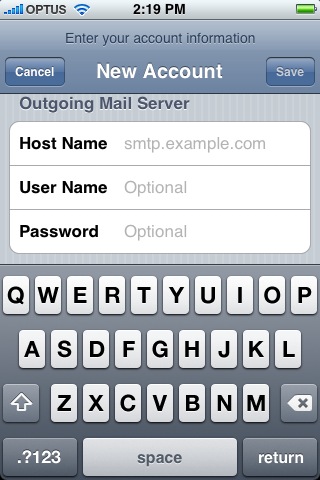
Outgoing Mail Server Settings for Spiffy Stores are;
Host Name: Your mail server domain that is displayed on the "Preferences -> Email Accounts" section of your store's Toolbox. (e.g. mail.yourstore.spiffystores.com)
Username: The full email address you are setting up(e.g. you@yourstore.spiffystores.com)
Password: The password that you set when you created your mailbox.
Note that although this section says it is optional, you MUST enter your username and password here to be able to send mail.
When you have entered these details, tap "SAVE".
|
|
|
|
|
|
|
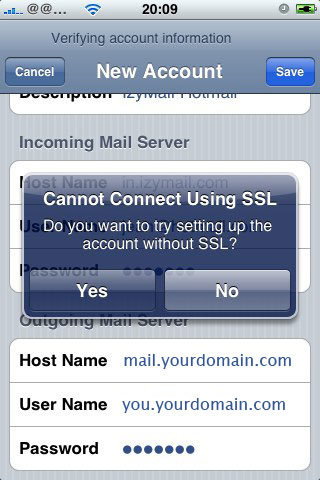
Your iPhone will attempt to connect using SSL. It will then ask the following question...
"Do you want to try setting up the account without SSL?"
Click "Yes"
|
|
|
|
|
|
|
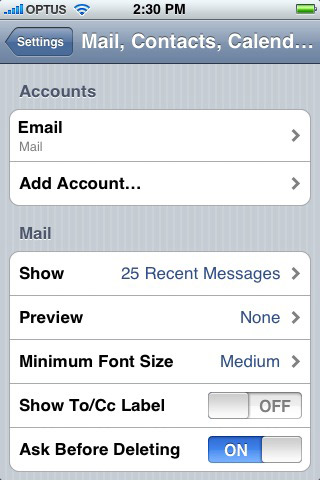
Save your changes and you should be put back to this screen.
Tap on the email account you just setup (Email will be replaced with your description you set earlier).
|
|
|
|
|
|
|
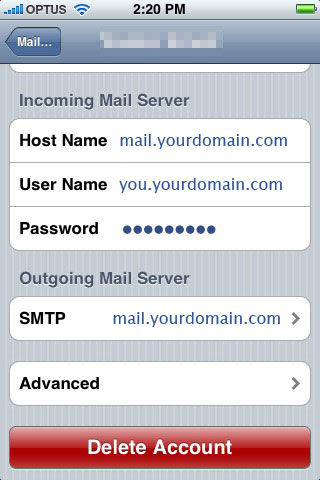
Scroll to the bottom of the screen and you should see the following options.
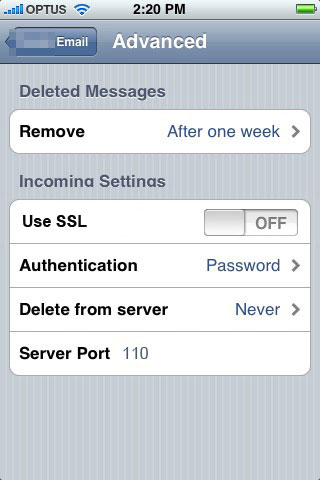
Tap on "Advanced to set up your to setup your outgoing settings.
|
|
|
|
|
|
|
You will want to confirm that Delete from Server is set to Never if you are also using a computer to download your email.
If you are only ever using your iPhone to get your email, the delete from server option should be set to "14 days".
|
|
|
|
|

|
|
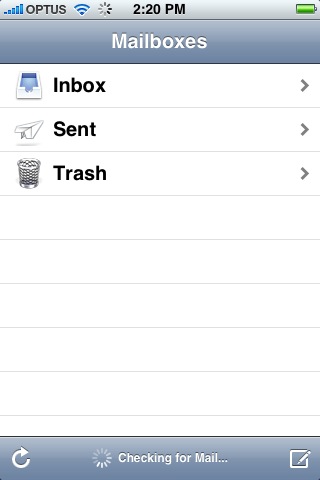
After this hit the home button and tap on the Mail app on your dock.
|
|
|
|
|
|
|
Your iPhone will automatically check for email and begin to download it.
If you have any problems with setting up your email addresses on your iPhone please contact us for support.
|


