Difference between revisions of "Creating a data feed for Google Merchant Center"
From Spiffy Stores Knowledge Base
| Line 12: | Line 12: | ||
=== Step 2 - Creating your data feed === | === Step 2 - Creating your data feed === | ||
<br> | <br> | ||
| − | <gallery heights=" | + | <gallery heights="200px" widths="200px" class="right">Image:Google-data-feed-01.png|Creating your data feed</gallery> |
After you have created your collection, go to the <br>"Marketing -> Product data feeds" section of your store's Toolbox, and click the "Activate" button in the Google Merchant Center section.<br><br> | After you have created your collection, go to the <br>"Marketing -> Product data feeds" section of your store's Toolbox, and click the "Activate" button in the Google Merchant Center section.<br><br> | ||
# Enter a name for your feed. It's not used anywhere except for your reference.<br> | # Enter a name for your feed. It's not used anywhere except for your reference.<br> | ||
Revision as of 12:00, 29 April 2014
Setting up a product data feed for your products is a great way to get added exposure for your online store by syndicating them to a variety of these shopping portals.
Product data feeds are updated whenever you make a change to your products, so you can be sure that they're up to date. To create a data feed for Google Merchant Center follow the instructions below.
IMPORTANT!
You need to ensure that all of your products have a unique SKU before submitting your data file to any provider. If you don't do this, they will not accept your submission!
Step 1 - Create a collection of products
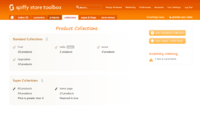
Collections Section

Firstly we need to have a list of products to send to Google Merchant Center. To create this, you'll need to create a collection that contains all of the products you want in your data feed. You can create a Standard Collection or a Super Collection. This can be done in the "Collections" section of your store's Toolbox.
If you already have created a collection for another provider (for example Shopping.com) then you can skip this step.
Step 2 - Creating your data feed
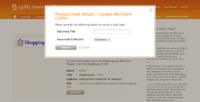
Creating your data feed

After you have created your collection, go to the
"Marketing -> Product data feeds" section of your store's Toolbox, and click the "Activate" button in the Google Merchant Center section.
- Enter a name for your feed. It's not used anywhere except for your reference.
- Select the collection you created in Step 1
- Click the "Activate" button
Step 3 - Adding your data feed on the shopping.com website
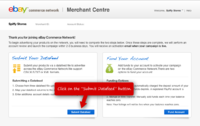
Adding your data feed on the shopping.com website

Once you have signed up for a Shopping.com merchant account, you can then add your data feed. On the home page of the Merchant Centre, click the "Submit Datafeed" button.
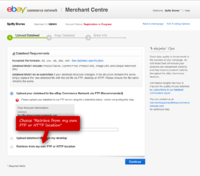
Choose your data feed format

On the next screen, choose "Retrieve from my own FTP or HTTP location"
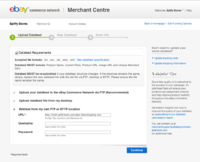
Paste in your URL

Paste in the URL of your data feed that you have copied from the "Marketing -> Product data feeds" section of your store's Toolbox. In most browsers, you can right-click on the URL and copy it.
When you have done this, click the continue button.
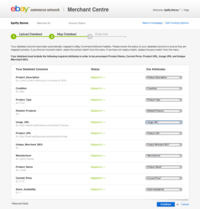
Data feed format.

You can safely skip past the next screen. All of the fields should be correctly assigned.
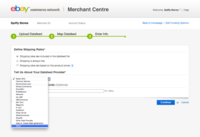
Data feed options

Select "Shipping rates are included in the data feed file", and choose "Other" for "Tell Us About Your Datafeed Provider". After clicking the "Continue" button, you should see a confirmation screen.
If you are contacted by Shopping.com about issues with your data feed, please let us know by forwarding us the email.