Creating a data feed for Facebook
More detailed instructions can be found here -> Selling on Facebook
To create a feed for Facebook, you'll need to do three things.
- Create a new collection that contains all of the products you want to include in your product feed.
- Create your data feed.
- Add your data feed to Facebook
Product data feeds are updated whenever you make a change to your products, so you can be sure that they're up to date. To create a data feed for Facebook follow the instructions below.
IMPORTANT!
You need to ensure that all of your products have a unique SKU before submitting your data file to any provider. If you don't do this, they will not accept your submission!
Step 1 - Create a collection of products
-
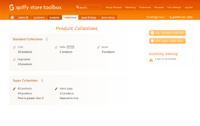 Collections Section

Firstly we need to have a list of products to send to Facebook. To create this, you'll need to create a collection that contains all of the products you want in your data feed. You can create a Standard Collection or a Super Collection. This can be done in the "Collections" section of your store's Toolbox.
If you already have created a collection for another provider (for example Google Merchant Center) then you can skip this step.
Step 2 - Creating your data feed
-
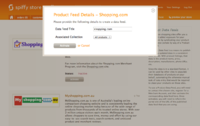 Creating your data feed

After you have created your collection, go to the
"Marketing -> Product data feeds" section of your store's Toolbox, and click the "Activate" button in the Facebook section.
- Enter a name for your feed. It's not used anywhere except for your reference
- Select the collection you created in Step 1
- Click the "Activate" button
Step 3 - Adding your data feed on Facebook
When you're logged in to the appropriate section in Facebook's business section, paste in the URL of your data feed that you have copied from the "Marketing -> Product data feeds" section of your store's Toolbox. In most browsers, you can right-click on the URL and copy it.
If you are contacted by Facebook about issues with your data feed, please let us know by forwarding us their email.
Setting a default product category
Facebook requires every item in your catalogue to have a product category. Spiffy Stores sets one for you automatically:
- If a product has its own Product Category (set on the product's details page), that category is sent to Facebook.
- If a product doesn't have its own category, the feed's Default Product Category is used instead.
- If neither is set, the product is left out of the feed.
To set the default category, go to "Marketing -> Product data feeds" and click the (edit) link next to the Facebook feed's title. In the "Product Feed Details" window, choose a category from the Default Product Category field and click Update. The field searches the standard product taxonomy as you type.
The chosen category is listed against "Default Product Category" on the "Marketing -> Product data feeds" page. Leave the field blank if you would rather exclude products that don't have their own category.
IMPORTANT!
Choose the closest matching category from the list. A category that isn't part of the standard product taxonomy may be rejected by Facebook.