How to configure Outlook 2011 on OSX
From Spiffy Stores Knowledge Base
Revision as of 10:35, 15 October 2014 by Shawn (talk | contribs) (→Setting Up Outlook 2011 on OS X)
Setting Up Outlook 2011 on OS X
This tutorial will help you to configureOutlook 2011 on OS X to access your Spiffy Stores email account.
For other email software, refer to How to set up your email program to access your Spiffy Stores mailboxes
Note: In these instructions, yourstore refers to the name given to your Spiffy Store, and this is the name that appears in your spiffystores.com domain name. For example, if your store is called sellmore, then your Spiffy Stores domain name will be sellmore.spiffystores.com.
Please Note: We provide online tutorials to help you configure your email software as a courtesy. However, our support staff are unable to provide any support on how to use or configure third-party software on your computer, laptop, tablet or smartphone. We will provide support for any issues relating to the software and services on our servers, but you will need to contact the software manufacturer or visit their relevant online support pages for help with the software that they provide.
To set up Outlook 2011:
- To open Outlook, click its icon in the Dock or browse to the Outlook application inside "Macintosh HD" then "Applications".
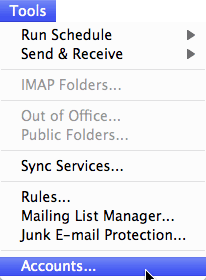
If this is the first time you have set up Outlook, you will be prompted to set up a new Mail account, if you are, skip to step 3, otherwise please continue to step 2. - Go to the "Tools" menu at the top then select "Accounts".
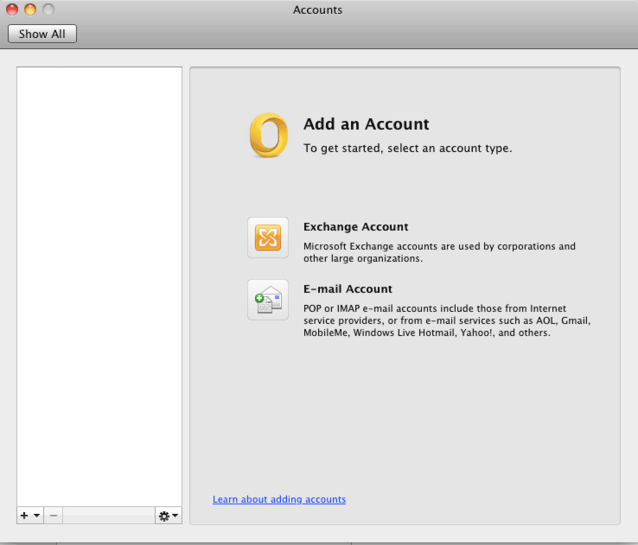
- You’ll see the Accounts window. Click E-mail Account.
- Mail should automatically choose POP as the account type. This is correct. If it doesn't, you will need to select POP.
Set the Incoming mail server to "mail.spiffystores.com".
Your username should be your full Spiffy Stores email address as it appears in your store toolbox on the "Preferences >> Email Accounts" page, e.g. "joe@joeswidgets.spiffystores.com", and the password should automatically carry over from the previous page. If it does not, simply retype it in the password field.
Click "Continue". Mail will then attempt to verify your settings by logging in. If you are not connected to the Internet, you'll get an error, which you should ignore at this point.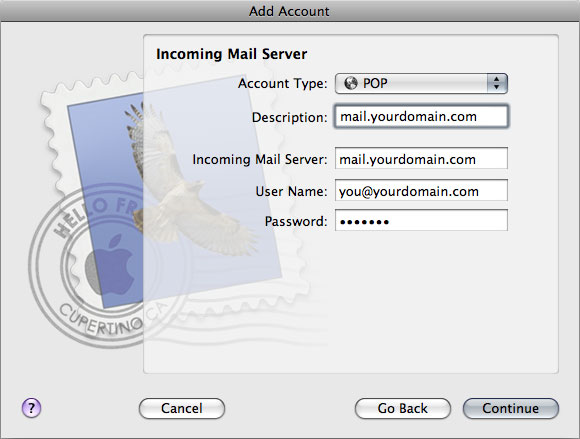
- Tick the box labelled use "Secure Sockets Layer".
Ensure that "Password" is selected in the "Authentication" drop-down box and click "Continue".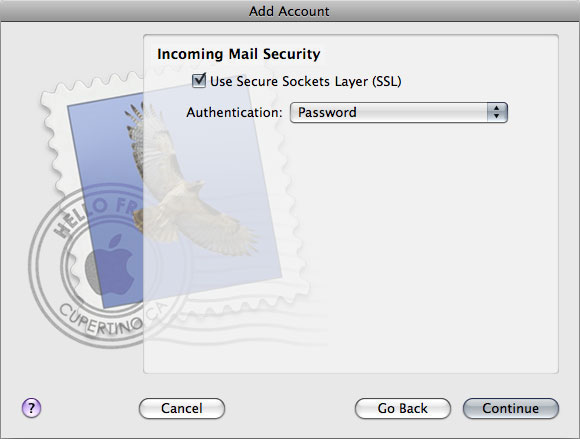
- Set the outgoing mail server to "mail.spiffystores.com".
Ensure "Use only this server" is un-ticked and "Use authentication" is ticked.
In the "User Name" field, enter your full Spiffy Stores email address as it appears in your store toolbox on the "Preferences >> Email Accounts" page, e.g. "joe@joeswidgets.spiffystores.com".
The password should automatically carry over from the previous page. If it does not, simply retype it in the password field. Click "Continue" to proceed.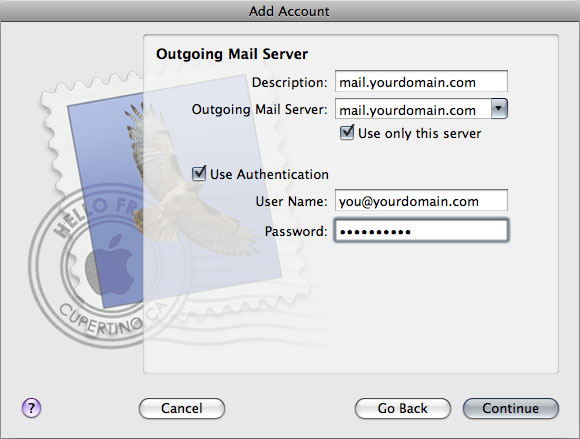
- Tick the box labelled use "Secure Sockets Layer".
Ensure that "Password" is selected in the "Authentication" drop-down box and click "Continue".
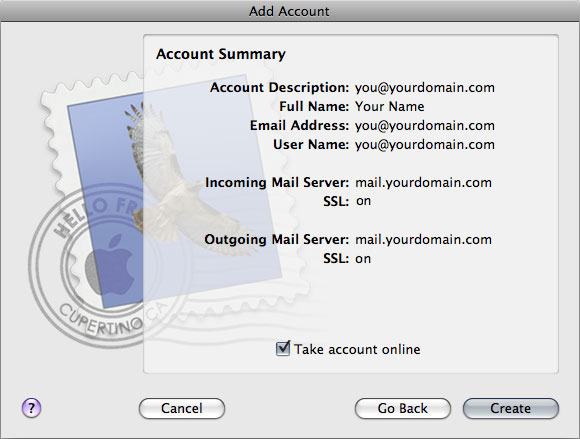
- You will be presented with a final summary of the details you have entered to confirm they are correct. The screen below shows an example of correct details.
If you're happy with your details, click "Create" to commit them.