Difference between revisions of "How to Configure Microsoft Outlook 2003"
From Spiffy Stores Knowledge Base
| Line 22: | Line 22: | ||
# You should now be page on the "E-mail Accounts" window, so Click Next, and "Finish" to save your settings.<br><br>[[Image:Email outlook2003_9.png]]<br><br>[[Image:Email outlook2003_10.png]]<br><br> | # You should now be page on the "E-mail Accounts" window, so Click Next, and "Finish" to save your settings.<br><br>[[Image:Email outlook2003_9.png]]<br><br>[[Image:Email outlook2003_10.png]]<br><br> | ||
# You may need to review your account settings if you want to customize the way Outlook handles your email. You can find more information about Outlook at http://support.microsoft.com/ph/2520/en-au. | # You may need to review your account settings if you want to customize the way Outlook handles your email. You can find more information about Outlook at http://support.microsoft.com/ph/2520/en-au. | ||
| + | |||
| + | == Further Reference == | ||
| + | |||
| + | * [[Setting up your email]] | ||
| + | * [[How to access your Spiffy Stores mailboxes through webmail]] | ||
| + | * [[How to set up your email program to access your Spiffy Stores mailboxes]] | ||
Revision as of 21:15, 12 March 2013
Setting Up Microsoft Outlook 2003
To read your email messages using Microsoft Outlook 2003, you will need to configure several Microsoft Outlook email service options.
For other email software, refer to How to set up your email program to access your Spiffy Stores mailboxes
Note: In these instructions, yourstore refers to the name given to your Spiffy Store, and this is the name that appears in your spiffystores.com domain name. For example, if your store is called sellmore, then your Spiffy Stores domain name will be sellmore.spiffystores.com.
To set up Microsoft Outlook 2003:
- Open Microsoft Outlook.
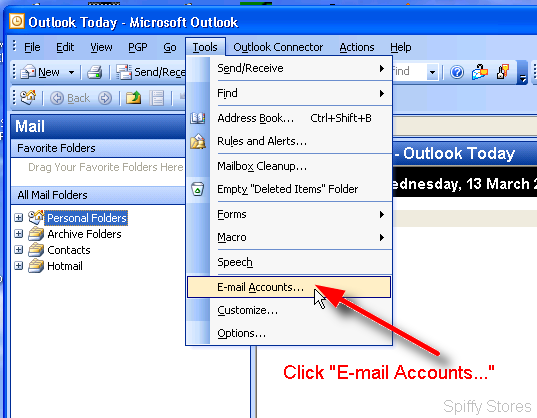
- Select "Tools >> E-mail Accounts..." from the menu.
- Choose "Add a new e-mail account", and click "Next".

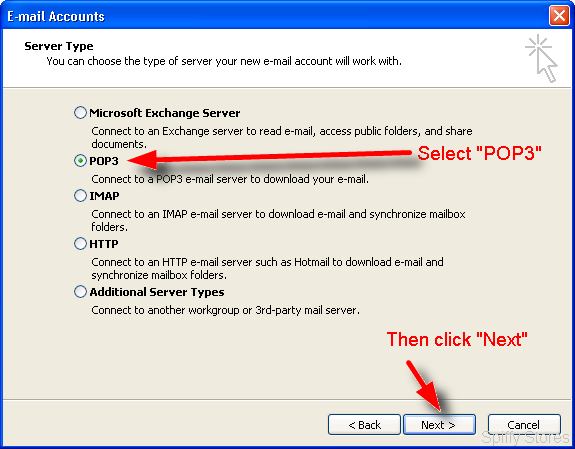
- For your server type, select "POP3" and click "Next".
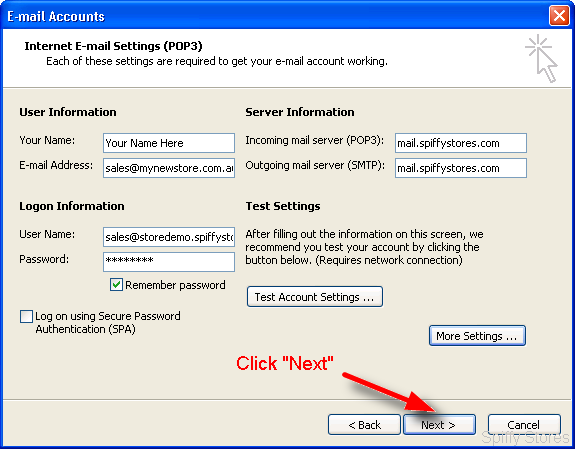
- On the Internet E-mail Settings (POP3) window, enter your information as follows:
Your Name: Enter your first and last name E-mail Address: Enter your e-mail address. If you're also using a custom domain name in your store, you can enter the email address that you want people to see when you send them email. e.g. joe@joeswidgets.com User Name: Your username should be your full Spiffy Stores email address as it appears in your store toolbox on the "Preferences >> Email Accounts" page (e.g. joe@joeswidgets.spiffystores.com). Password: Enter the password you set up for your e-mail account Incoming mail server (POP3): Enter mail.spiffystores.com Outgoing mail server (SMTP): Enter mail.spiffystores.com 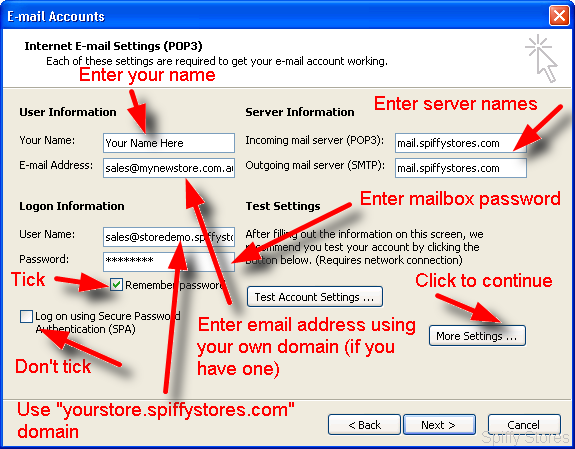
- Click "More Settings...".
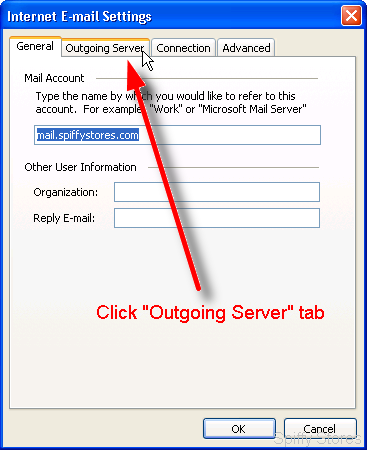
- On the Internet E-mail Settings window, select the "Outgoing Server" tab.
- Select "My outgoing server (SMTP) requires authentication".

- Select "Use same settings as my incoming mail server".
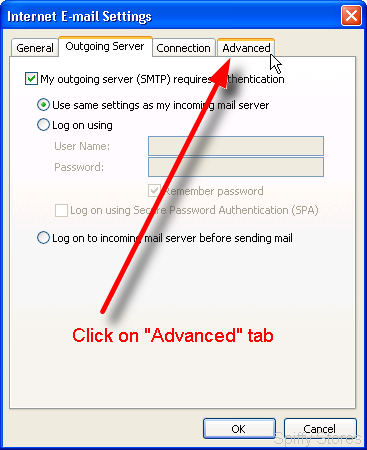
- Select the "Advanced" tab.
Change the "Incoming server (POP3)" port to 995 and tick the "SSL" box.
Change the "Outgoing server (SMTP)" port to 465 and tick the "SSL" box.
If you would also like to use webmail to read your messages, then you need to set the options to leave the messages on the server for a number of days.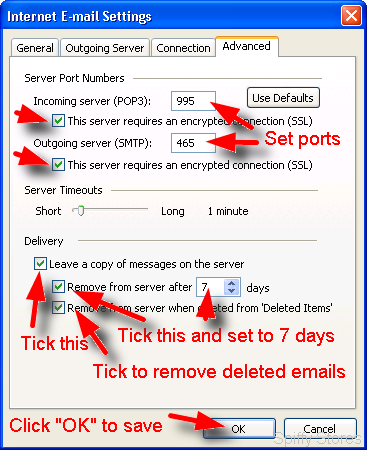
- Click OK
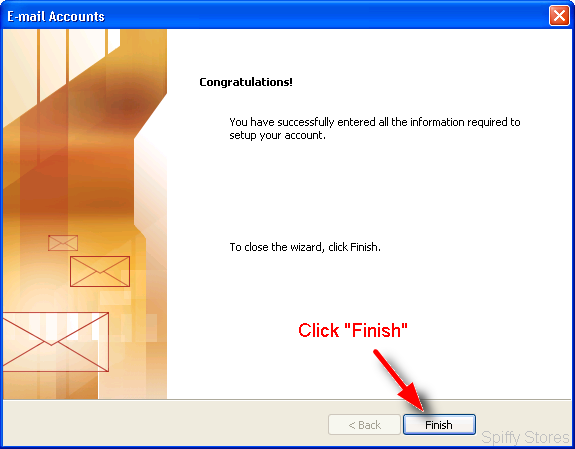
- You should now be page on the "E-mail Accounts" window, so Click Next, and "Finish" to save your settings.
- You may need to review your account settings if you want to customize the way Outlook handles your email. You can find more information about Outlook at http://support.microsoft.com/ph/2520/en-au.


