Difference between revisions of "How to configure Mozilla Thunderbird"
From Spiffy Stores Knowledge Base
| Line 18: | Line 18: | ||
# Verify your account information and click Finish<p><br>[[Image:Email thunderbird8.png]]<br><br></p> | # Verify your account information and click Finish<p><br>[[Image:Email thunderbird8.png]]<br><br></p> | ||
# In the Account Settings window, select "Outgoing Server" listed below your new account<p><br>[[Image:Email thunderbird9.png]]<br><br></p> | # In the Account Settings window, select "Outgoing Server" listed below your new account<p><br>[[Image:Email thunderbird9.png]]<br><br></p> | ||
| − | # Enter mail.''yourstore''.spiffystores.com for the "Server Name" and change the "Port" setting to | + | # Enter mail.''yourstore''.spiffystores.com for the "Server Name" and change the "Port" setting to 587.<br>Select "Use name and password" and enter your e-mail address. Thunderbird will ask you for your password the first time you try to send mail.<br>Click OK<p><br>[[Image:Email thunderbird10.png]]<br><br></p> |
#Update your new server settings to leave messages on the server so that this account can be used for webmail<p><br>[[Image:Email thunderbird11.png]]<br><br></p> | #Update your new server settings to leave messages on the server so that this account can be used for webmail<p><br>[[Image:Email thunderbird11.png]]<br><br></p> | ||
Revision as of 12:32, 4 July 2012
Setting Up Mozilla Thunderbird
This tutorial will help you set up the Mozilla Thunderbird e-mail client to work with your e-mail account.
For other email software, refer to How to set up your email program to access your Spiffy Stores mailboxes
To set up Mozilla Thunderbird:
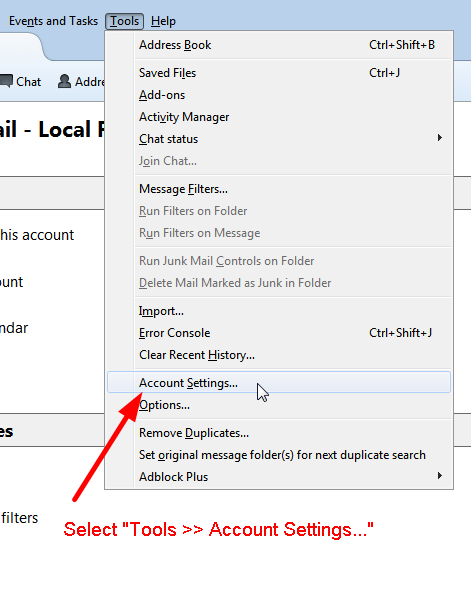
- In Mozilla Thunderbird, select "Tools >> Account Settings..."
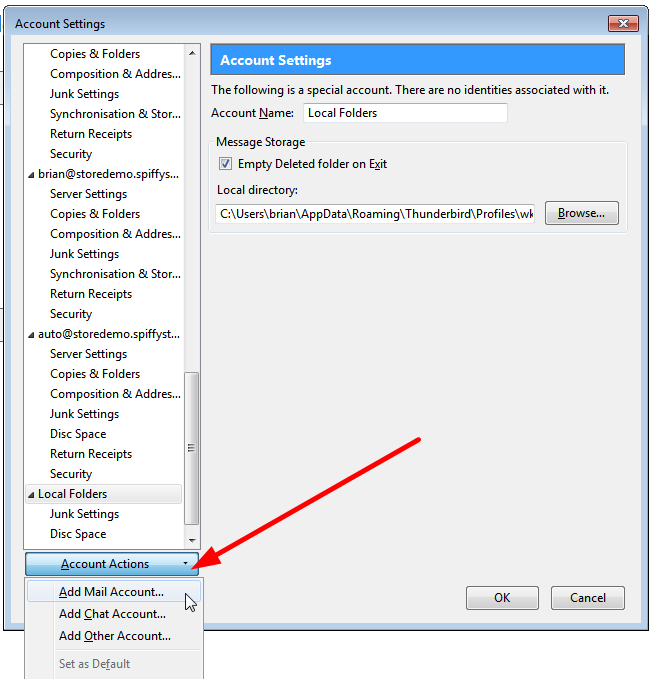
- In the "Account Settings" window, select "Add Account..."
- Select "Email account " and click Next
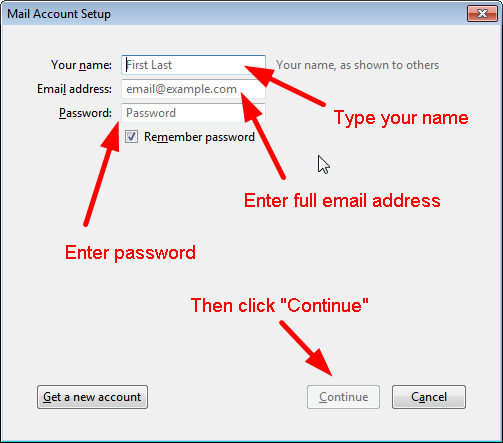
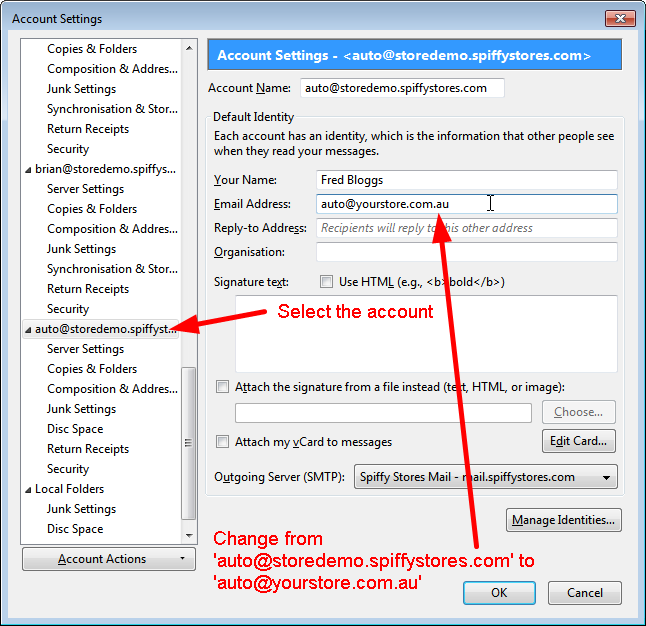
- Enter your name and e-mail address
- Select "POP" as the type of incoming server you are using. Your incoming server is mail.yourstore.spiffystores.com
- Click Next
- Enter your full e-mail address for the "Incoming User Name," and "Outgoing User Name."
- Click Next
- Enter a name for your e-mail account and click Next
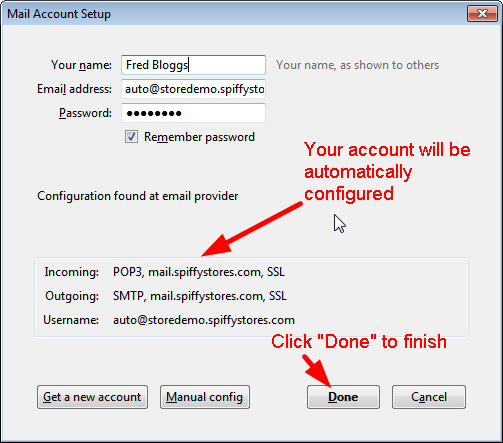
- Verify your account information and click Finish
- In the Account Settings window, select "Outgoing Server" listed below your new account
- Enter mail.yourstore.spiffystores.com for the "Server Name" and change the "Port" setting to 587.
Select "Use name and password" and enter your e-mail address. Thunderbird will ask you for your password the first time you try to send mail.
Click OK - Update your new server settings to leave messages on the server so that this account can be used for webmail


