The Georgia theme guide
From Spiffy Stores Knowledge Base
Please note: The Georgia theme is not mobile responsive, and will be retired this year. We have no plans on updating this theme in the future.
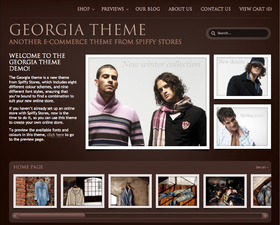
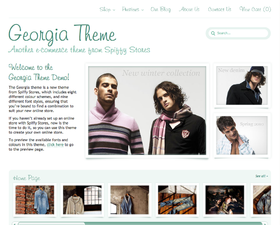
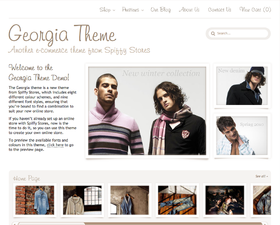
The Georgia Theme for Spiffy Stores includes a host of features including 8 different colour schemes, and 9 different font options.
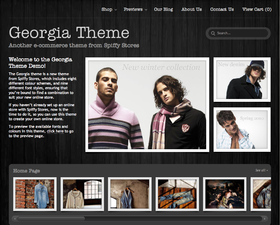
Charcoal

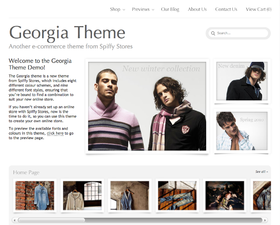
Pearl


Pink

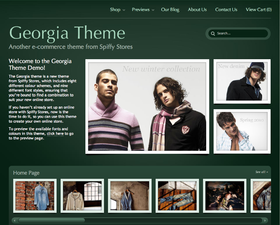
Forest

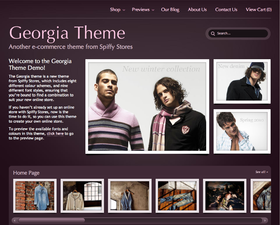
Amethyst

Chocolate

Mint

Sand

Theme features
Built-in fonts

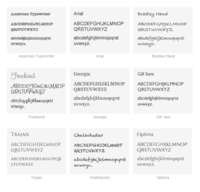
- 9 title fonts
You have a choice of nine different fonts. Hopefully you’ll find one that works with the look you’re trying to get for your store. if not, we can easily add a new font to your store for a small fee. - Upload your own logo
Either upload your own logo to your store, or use a by-line under your store name. - Feature images on your home page
Your store home page displays 3 feature images. You can choose to link these images through to pages in your store, or you can just leave the link blank. - Display up to 3 collections on your home page
- Social Media
You can choose to display social media links on product pages, and blog articles. The store footer also includes links to your Facebook and Twitter pages, a link to your blog’s built-in RSS feed, and a link to your contact page. - Accepted payment methods
You can also choose to display what payment methods you select in your store. If your store accepts payment by PayPal, you would choose PayPal, Visa and MasterCard here.
To preview the Georgia Theme for Spiffy Stores, head on over to the theme’s demo site.
There’s also some handy tips in the blog there on how to insert images in the built-in blog in your Spiffy Store.
By default, the Georgia theme uses the menu called "Top menu" in your store's header.
If you're switching to the Georgia theme from another theme, and have all of your menu items in a different menu, you can select the menu that you want to use in your store's header in the Store Header section of your Theme editor. You simply select the menu you want to use and click the Save Settings button.
Please note that you will need to include a link to your cart page in the top menu of your store, as your customers will have no way to get there.
The Georgia theme supports up to 4 levels of drop-down menus.
There's no mucking about with code to get your drop-down menus working. You can create them simply by following the simple steps below. One important note though... you can't create links to nothing! If you haven't created the page or collection you want to link to, you need to create them first.
First item
- Log in to your store's Toolbox and go to the "Store menus" tab
- Scroll down to the "Top Menu" section, and click "Add new Menu Item"
- Type in the name of your menu item
- Select whether you want your menu item to link to a page, product, or collection
- A new list of options will appear. Select the name of your page that you want to link to.
- Click the "Add menu item" button to save.
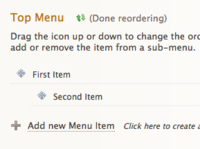
Creating a drop-down menu

Sub item
- Create another menu item the same way you created one above
- Click the "Reorder" link
- Click and drag the item you want to drop down to the right (so it sits directly underneath and to the right of the one above - see example)
- Click "Done reordering"
Previewing your store should show your second item as a drop-down. You can do this with multiple levels, and re-arrange your menus by dragging items up, down, left, or right whilst you're in "re-order" mode.
Editing your home page
Editing your home page in the Theme Editor

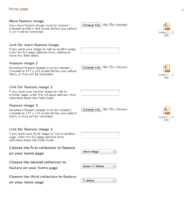
The Georgia theme includes 3 main images on the home page that you can also add links to, so you can direct customers to specific areas in your store.
You edit these images in the "Home page" section of your Theme Editor, which can be found in the "Design & assets -> theme editor" section of your store's Toolbox. There you can upload new slideshow images, delete images and enter links.
You will need to upload your slideshow images at the correct sizes so that they're not stretched or squashed. You can do this using most image editing programs, but many people find Pixlr useful.
Your main feature image must be resized / cropped to 406 x 304 pixels, and your secondary feature images must be resized / cropped to 177 x 133 pixels before you upload them, or they will be stretched.
Using Pixlr to create a your images
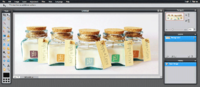
Pixlr editor

- Go to the Pixlr editor
- Click "Create a new image"
- Set the width to 406 and the height to 304, and click OK. If you're creating images for the smaller area, they should be 177 x 133.
- You now have your canvas to work within. You will need to explore the various tools and options. You can open your own images in Pixlr using "File -> Open image" in the Pixlr menu. You can then copy and paste your images into your slide. You need to make sure when you're doing this, that you don't stretch your images. You can do this by holding down the shift key when re-sizing.
- When your slide is looking gorgeous, save it by choosing "File -> Save" from the Pixlr top menu.
- Choose JPEG for your format, and set your quality to 80
- When you've saved the file to your computer, upload it to your theme editor.
Editing the text on your home page
The text on your home page can be edited in the "pages and blogs" section of your store's Toolbox. Edit and save the page called "Home Page" to make changes.
Selecting which collections to display
You can display up to 3 collections on your home page. These can be selected in the "Home page" section of your Theme Editor, which can be found in the "Design & assets -> theme editor" section of your store's Toolbox.
Product image sizes
The Georgia Theme has some fancy image frames, which make product photos you upload look a lot nicer in your store than if a photo was just plonked on the page.
The trade-off for this is that you will need to either change your store setup, so it re-sizes or crops your images to landscape, or you will need to re-size your product images before you upload them to your store. Read on to find out more about each method.
Changing your stores’ product image sizes
To change the default image sizes that your Spiffy Store uses, you will need to do a couple of things… turn on advanced configuration options in your preferences, and then edit the product image sizes in your theme editor. Instructions on each step are below.
Step 1. Turn on advanced configuration options
- Log in to your store, and go to the “Your Settings” page in the top right menu
- Scroll down to the “Advanced Configuration” section, and tick the box that says “Enable advanced theme options.”
- Click the “Save changes” button.
Step 2. Change your default image sizes
- Go to the “Design & assets >> Theme editor” section of your toolbox in the top right menu
- Scroll down to the “Custom Product Image Sizes” section.
- Change the “Compact Image” dimensions to 133 wide and 100 high, and tick both the boxes for “cropped” and “padded”.
- Change the “Medium Image” dimensions to 177 wide and 133 high, and tick both the boxes for “cropped” and “padded”.
- Change the “Large Image” dimensions to 406 wide and 304 high, and tick both the boxes for “cropped” and “padded”.
- Click the “Save” button.
Resizing your own photos
Resizing your images before you upload them gives you far greater control. Not everyone knows how to use these programs, which is why we have recommended the “Custom image sizes” option for most people.
Most people have some sort of image editing program that allows them to re-size or crop an image. There are plenty of free ones out there as well.
If you’ve got a handle on editing your own images… give it a go!
If you upload product images that are 800px wide x 600px high (landscape), then your photos should come out gorgeous.
More information about using the Georgia theme can be found on the theme demo site at http://georgia-dark.spiffystores.com/blogs/frontpage/1821-product-image-sizes